 Week 9 - Week 12
30/5/2023 - 20/6/2023
Leong Jiahui / 0353469
Bachelor of Design (Honours) in Creative Media
GCD 61804/ VEHICLE AND PROPS DESIGN
Project 2: Production
Instructions
Lectures & Tutorials
WEEK 9 (30/5/2023)
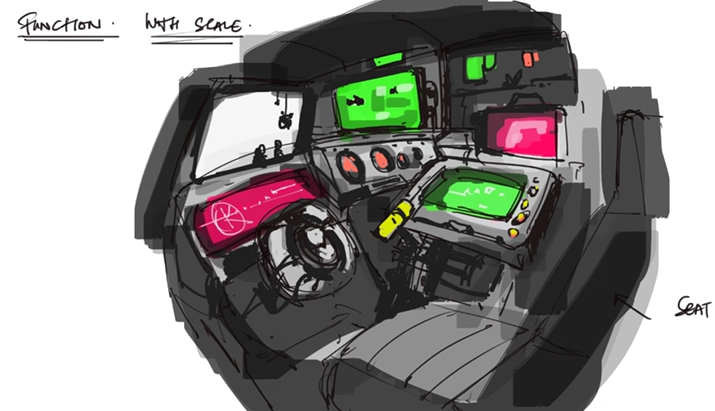
This week, we begin Project 2. We were taught the fundamentals of rendering as well as given a live demo of the vehicle interior building process. We were told that this was the part where we were allowed to go ham and utilize creative motifs.
 |
| fig 1.1.1 The rendering process (30/5/2023) |
 |
| fig 1.1.2 Vehicle interior tutorial (30/5/2023) |
 |
| fig 1.1.3 Vehicle interior demo pt1 (30/5/2023) |
 |
| fig 1.1.4 Vehicle interior demo pt 2 (30/5/2023) |
WEEK 10 (6/6/2023)
This week, we were taught how to use 3d sculpting software in assisting our work. He also demonstrated how to build a silhouette sketch from existing references by painting over them.
 |
| fig 1.2.1 zbrush to silhouette block-out demo(6/6/2023) |
 |
| fig 1.2.2 Silhouette sketches live demo from existing reference (6/6/2023) |
 |
| fig 1.2.3 vehicle interior live demo (6/6/2023) |
WEEK 11 (13/6/2023)
To do:
- try out 3D on blender
- finalise interior design w rendering
More tutorials on how we could use 3d modeling software to create interesting silhouettes and give our work more depth.
 |
| fig 1.3.1 Blender live demo (13/6/2023) |
 |
| fig 1.3.2 Blender demo (/6/2023) |
Blender live demo
- scale - s (xyz based on desired axis)
- duplicate - shift d (can straight start moving. press xyz based on desired axis)
- rotate - r (xyz)
- g - move
- snap to - magnet tool (on top toolbar)
- scale - scroll
- move - mouse drag
- open camera , add image (insert>reference)
- images inserted will be slanted. set rotation of all axis to be 0
- turn on x-ray for better view of ref images
- collection=folders
- object mode (v in illus)
- edit mode (a in illus)
- switch between modes by pressing 123 (object,edit,face)
- insert - i
- extrude/intrude - e (selecting faces is useful)
- right click have a lot of tools
- select edges, ctrl b to shape
- more edges, more details can be made
- select edges, ctrl r creates edges. scrolling down will create more edges. (helpful in making curvatures)
- ctrl while selecting will only select within the loop (quicken process)
- Indents (1. extrude 2.scale down)
- modifier>boolean. drop down menu to apply (extracts & cuts compartments)
- smooth surface - subdivide
- f12 to render
WEEK 12 (20/6/2023)
To do:
- refine and submit Project 2
- Start blender
Blender live demo
- ctrl r> loop cut & slice > modifier
- add modifier>bevel?
- add segments -ctrl r
- select edges > ctrl b > bev> scroll to add segements
Final Outcome
Feedback
WEEK 10 (6/6/2023)
Continue to look for references. Explore on the expansion of vehicles if I feel that the front of my vehicle is too small with not much space to work with. Try timing myself when sketching to produce more sketches in a shorter amount of time in order to work more effectively. Splitting the vehicle into sections and parts are also helpful.
Good start, it's fine for it to look simple but require more entertaining elements. Depth & dimension can be utilized. Have more extruding parts to make it look more interesting. Using 3d applications like blender and Zbrush is helpful to examine nice-looking protruding parts.
The side angles are ok to work with. The front angle needs a bit more work. Add more interesting elements x2. Utilize Ai to get more ideas. Also consider fun functionalities and concepts.
 |
| fig 2.1.1 W11 feedback (11/6/2023) |
 |
| fig 2.1.2 W11 feedback (11/6/2023) |
WEEK 12 (20/6/2023)
 |
| fig 2.2.1 W12 feedback (12/6/2023) |
- add car mat design
- more dimension & panels
- more colour variation in the interior of the car (now is all red, which is not wrong, but try paying with more colours)
- consider the textures and materials
Start on Blender asap. If faced with any difficulties, inform immediately to negotiate workload HAHAH
Reflection
Having more creative liberty to go ham on the little little details in this project sounded fun, but y'know the feeling when you finally get to do it and suddenly you can't do it anymore? Yeah. Building the interior for my small cute little cockpit have been a challenge and a journey. Expanding my visual library has proved to be the most important step in every assignment, as observing and studying other works really helped me build up this project.
Comments
Post a Comment