
1/9/2023 - 15/12/2023
Leong Jiahui / 0353469
Bachelor of Design (Honours) in Creative Media
DST 60904/ DIGITAL MATTE PAINTING
Instructions
Assignment Brief
You will undergo a series of exercises that will enhance your understanding of matte as listed below:
- Perspective Studies (Landscapes and Interiors)
- Compositions
- Value Studies
- Sky replacements
- 2.5D mattes
- Invisible Set Extensions
WEEK 1 (1/9/2023)
To-do:
- 1 theme, 3 sketches
- Look up ref photos of (around 10):
- existing location
- clouds
- forests
- trees
- mountains
- canyons
- buildings
- flames
- grounds, walkways
- Look up digital matte paintings
- Try out Photoshop Beta
- perspective practice
WEEK 2 (8/9/2023)
Look up high-res photos on Pexels, Unsplash, texture.com
- varieties of clouds
- CG textures
- familiarize ourselves with lens terms & cinematography
- Find live-action movie/game/TV series vista scenes (baseplate) and expand them
- 1 sky replacement exercise (look for assets first)
This week, we were taught how to organise and create an effective moldboard. I feel like every time we go through the moodboard lecture I learn something new, but my moodboard game is still not improving.
 |
| fig 2.1 One point perspective |
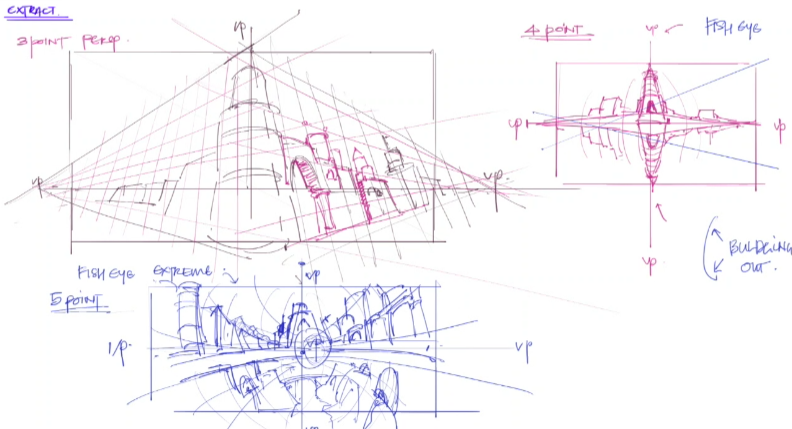 |
| fig 2.2 3,4 and 5 point perspective |
Y'know what? I think I might actually really like this
 |
| fig 2.3 matte painting sketching demo |
WEEK 3 (15/9/2023)
This week, we started working on the virtual plein air. I chose 3 photos to start with, and it was a lot tougher than expected. The entire process from blocking out to painting was very very time-consuming. The second painting was too complicated for my mental health. |
| fig 3.1.1 Virtual plein air progress |
- Aurora was off. Pay more attention to the details and the big blocks of colours.
WEEK 4 (22/9/2023)
Continuing my progress from last week, I tried my best trying to replicate the scenes. I used different textured brushes to recreate the environmental elements like grass and water. I also spent a lot of time texturing the rocks and mountains.
 |
| fig 4.1.1 Virtual plein air draft 1 |
Feedback
- grass saturation is too high. Adjust
- aurora is too big.
- give the mountain a hint of cool colour
- sky has a bit more orange
WEEK 5 (29/9/2023)
To-do:
- 1 theme, 6 thumbnail sketches
 |
| fig 5.1.1 W5 lecture |
 |
| fig 5.1.2 |
 |
| fig 5.1.1 Lecture: thumbnail sketches with Angkor Watt as base plate |
Sky Replacement Exercise
I started the week with the Sky replacement exercise. I used one of the photos I used for my virtual plein air cause I do not have the capacity to look up new aesthetic photos anymore. I looked up tutorials and utilized the Photoshop sky replacement tool to work on the 5 skies - rainbow, starry, stormy, sunrise and sunset. It was a challenge to get the hues and lighting completely right, but I tried my best adjusting.
 |
| fig 5.2.1 sky replacement exercise |
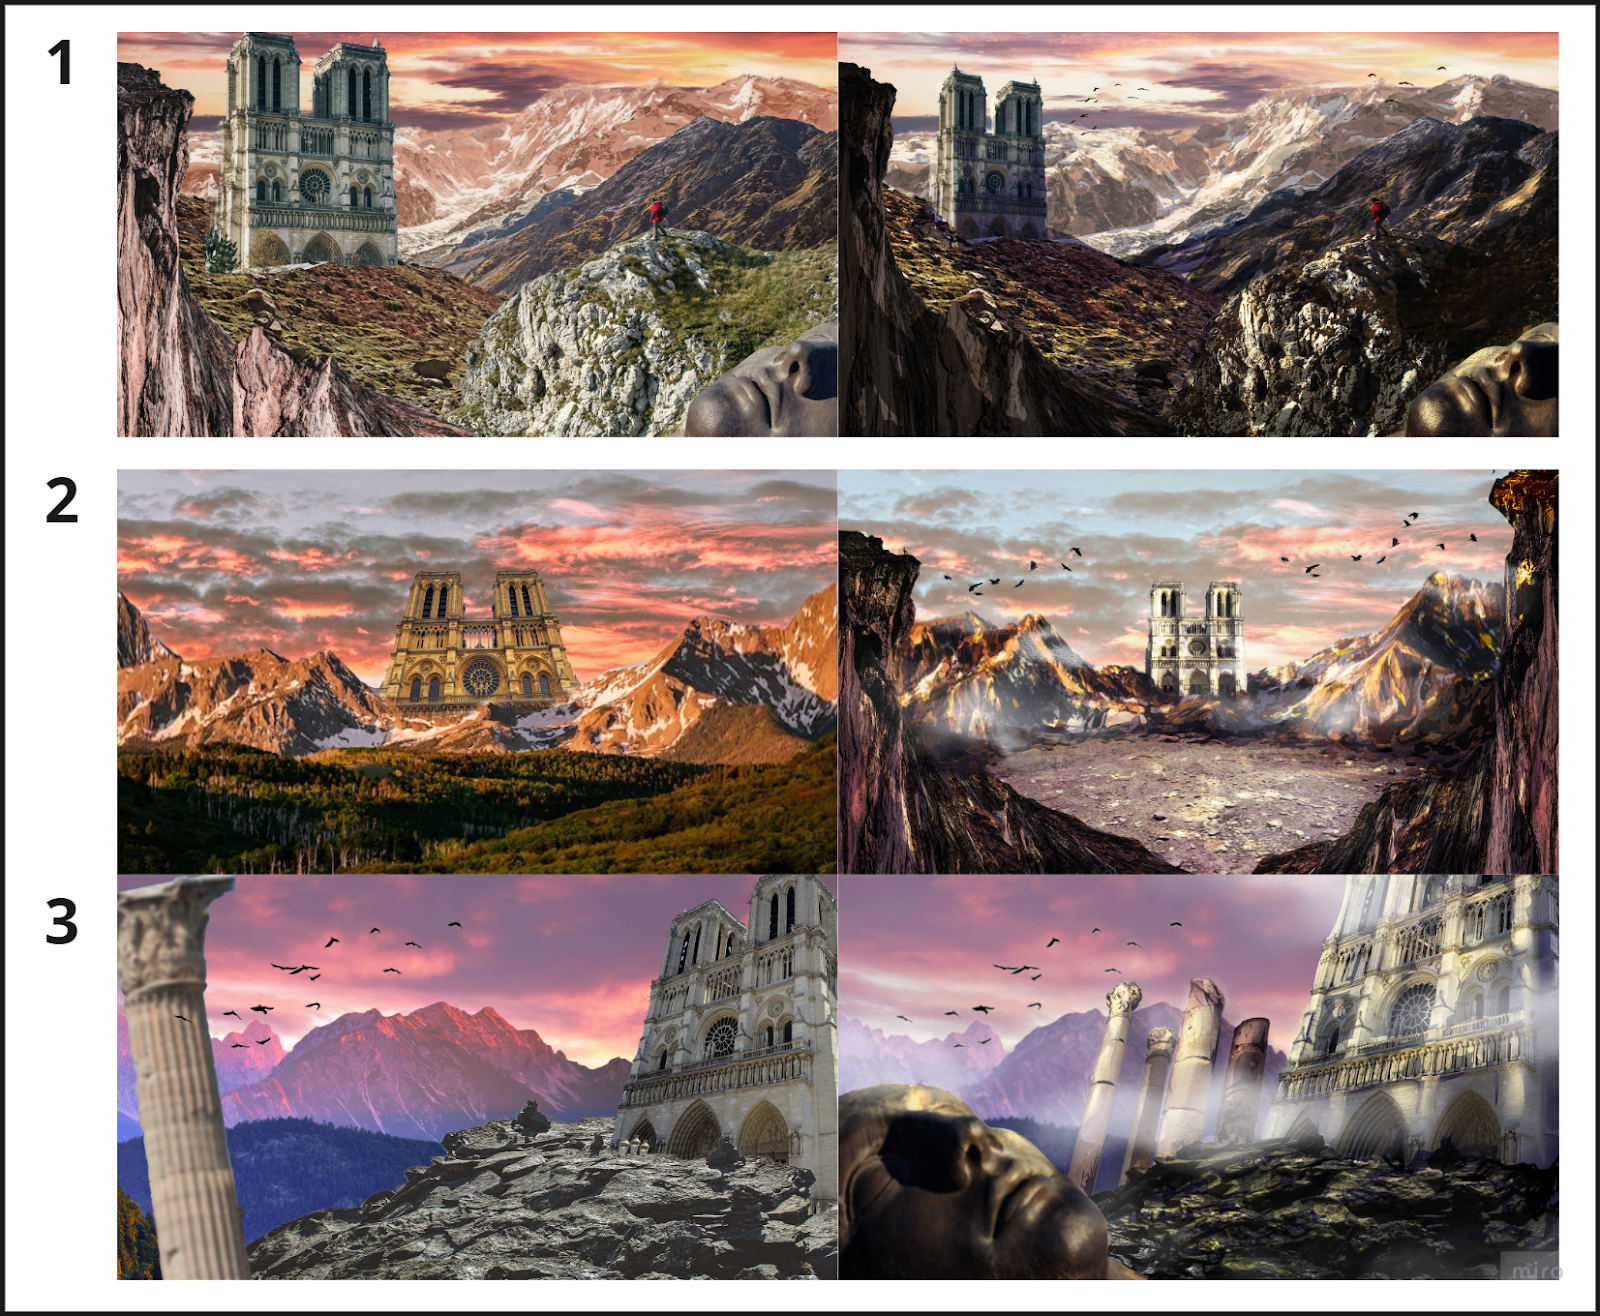
Next, I moved on to the thumbnail sketches for Project 1. I started out with some idea brainstorming. Since I did an Eastern Asian style for environment design, I decided to go with Western for DMP. After some research and looking at aesthetic photos, I came up with this setting of an abandoned Notre Dame in a magical, dreamy atmosphere somewhere in the ruins. Still, I did try out another Asian Japanese styled piece as I thought winter looks very good on Japan.
 |
| fig 5.3.1 notre-dames |
 |
| fig 5.3.2 kiyomizu-dera |
Feedback
 |
| fig 5.4.1 W6 feedback |
- Come up with a more solid storyline. It's all about the experience and what the scene enduces.
- ISE 1- look up references of city ruins (roman) - pompei
- try placing the building further so we don't have to worry about 3d
- consider the scale and if it makes sense
- look for the floor (base plate) and start from there
- 3, 5 & 9 is a good perspective
- explore more in terms of expanding the building itself. alter the structure, or add more floating elements (liyue!)
- add floating particles
- Sky replacement (don't waste too much time on this):
- rainbow - grass colour should change slightly (darker)
- starry - scale of stars is too big. (try photoshop generative ai)
- lightning - more ambience
- try making everything greyscale to check the lighting
WEEK 6 (6/10/2023)
To-do:
- try unreal
- do value painting of 3
- pick 1 to do photo bashing
 |
| fig 6.1.1 Matte painting example |
 |
| fig 6.1.2 value painting tutorial |
This week, I chose the 3 compositions from previous sketches to make value paintings. I gave it some shading and some colour ambience to gather a better of idea of how I wanted the piece to be. Then, I moved onto arranging photos that i scoured the internet for to attempt to build a sad excuse of my scene.
 |
| fig 6.2.1 ambience & photobashing |
Feedback
- make sure the scale and proportions make sense
- think about how the building can be embedded into the environment
- think about the values
WEEK 7 (13/10/2023) & WEEK 8 (20/10/2023)
To-do:
- value painting
- photo bashing
- look through PSD file
 |
| fig 7.1.1 photo bashing tutorial |
Finally a demonstration of how this whole thing works. I was baffled, tbh and now I'm more motivated to start as it is now clearer than ever, what needs to be done. We also watched Alitha together in class to better understand the use of matte painting in films and get inspiration.
I also compiled the exercises to be ready for submission.
Final Outcome
Exercises: Technical, Digital Matte Painting Sensibilities
Project 1: Invisible Set Extension (Pre-Production)
WEEK 9 (27/10/2023) & WEEK 10 (3/11/2023)
This week, I worked on photobashing. I was very inspired after watching a photo bashing painting progress, so I attempted it, ditching my Notre Dame completely and tried out this dystopian-looking city. It was, of course, a lot harder than it looked.
 |
| fig 9.1.1 cyberpunk vibes? (no) |
Coming back to Notre dames, I started refining and correcting my previous photobashing attempts. I painted over to create some shadows and highlights. It was actually quite a fun and therapeutic process.
 |
| fig 10.1 photobashing |
Feedback
- colour harmony & ambience is lacking, needs to fit the mood w good colour palette planning
- utilize fog to add ambience & hide. look up smoke bushes or photobash w smaoke. (use screen layer mode)
- be very aware of scales
- construct a path to the building (mountain path)
- lacking a clear distinction between foreground and background
- find a good and solid base plate
- 1 is too busy but empty. Don't work w too much noise
- needs to have a foundation for the building instead of just stucking it in.
- suggest to add some grassy areas to give more variation
- blend-x
- find elements that suit the building like Paris architecture. statue head is random and does not fit in
- add something to the building. For example grassy elements
- look at castle mountains and refer to how they embed it in the rocks
- think about the depth when compositing
- PLAN
- turn existing pieces into black & white and reblock out the composition
WEEK 10 (3/11/2023)
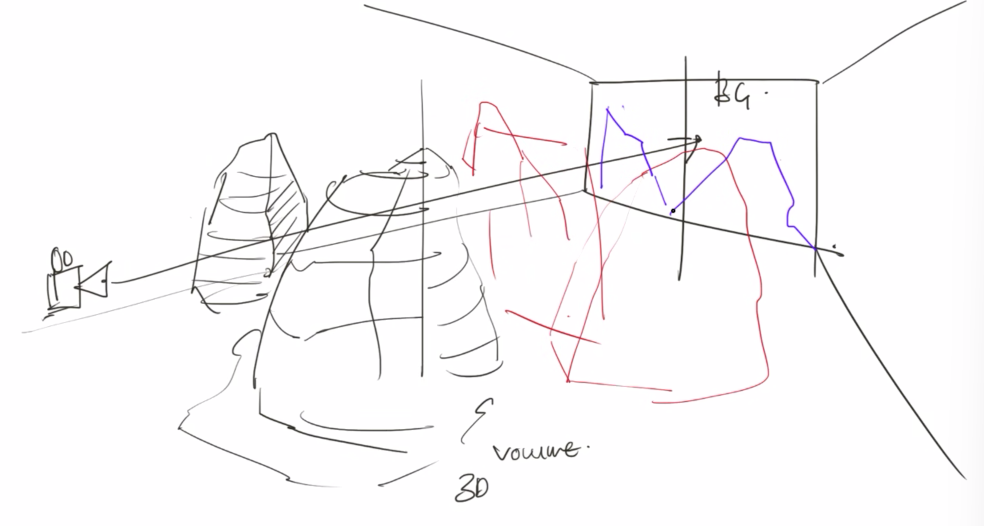
This week, the lecture was focused on how to produce a scenic view. We were taught to use blender to determine the scales of objects in a scene. There must be a sense of clarity between in the foreground, middle ground and background in terms of colour and proportions to make the overall scene more impactful. We were also given a quick tutorial on adding fog and ambience to the scene.
 |
| fig 10.1.scale & perspective |
I started working on my own matte painting once more. I added some greens to the middle ground to provide some distinction to the background. I also added some fog to give it a mysterious atmosphere.
 |
| fig 10.2.1invisible set extension 1 progress |
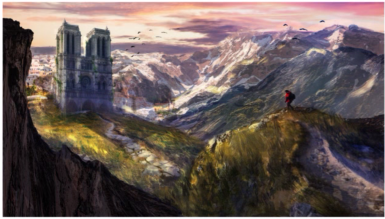
After staring at the first composition for too long, I moved on to the 2nd composition. I got rid of the foreground rocks because it didn't make much sense for them to be there. I then added grassy grounds to the foreground and gave the composition a pathway. I find that this composition gives a majestic vibe to the beginning of a great adventure.
 |
| fig 10.2.2 Invisible set extension 2 |
Feedback
- add some cool colour to balance out the orange
- mountains are too busy and have too many details, tone it down
- further away make it more smooth
- look out for a degree of detail. Far-away objects should not have too much detail.
- 1. The direction of the foreground grass is a bit off
- look into creating more depth
- open up the mountains at the back to give more depth
- lookup Notre Dame
- 2. too much mountains.
- Think more about the story, experience and camera movement
- to make the building more dramatic. Think about the weather and the ambience. What is the building all about? Worship? Village? Can add some life and villagers around the building.
- add camera lens glow
 |
| fig 10.3.1 cutting the composition |
 |
| fig 10.3.2 colour adjustments |
 |
| fig 10.3.3 W11 feedback |
Final Outcome
Project 1: Invisible Set Extension (Pre-Production)
Project 2: Invisible Set Extension
WEEK 11 (10/11/2023)
I forgot to add more sunlight and lens flare but here is what I have for this week:
WEEK 14 (1/12/2023)
The compositing ended up being quite fun, and the piece started coming together after adding foliage and playing around with the lighting and adding some light fog. I switched from back light to frontal light, so more parts of the building can be seen. I contemplated changing the sky colour to a hue that matches my Invisible Set extension, but the colours just aren't hitting in Unreal, so I adjusted it to a calm blue hue. It's fitting though, so I'm not complaining.
Next, I looked up how to give my foliage a bit of wind. The first tutorial I followed pulled out a lot of nodes, and was confusing the heck out of me, but the second one was a lot simpler and I managed to figure it out quite quickly.
Next, I moved on with the cinematics. I followed a few tutorials for this one, because I'm jumping between ones that I could understand best. It was a very simple process producing the cinematics, with the important controls working like Adobe AE.
So I wasn't very happy with how the first video turned out. The video was way too short, and there weren't frames at the end for me to work on. It's mainly the sequence editing error on my part though, I got too excited. I tried rendering a second one and believe me when I said my jaw dropped seeing the doubled amount of frames.
While waiting for that to complete, I looked up and downloaded sound effects I could use for the final video. I used Capcut to edit the video because I've heard good things about it, and by the time I thought I should've just stuck with Premiere Pro, I was already in too deep. At least I got to try out a different video editing tool, but I think this was more suited for vertical short form content like tiktok.
To-do:
- hand in Project 1
- further polish and refine Invisible set extensions
- work with blender
- look for 3d assets
This week, I started painting a lot. Besides the hue adjustments, I refined the grassy areas. I also added in more humans around the building to give it some life, and a community.
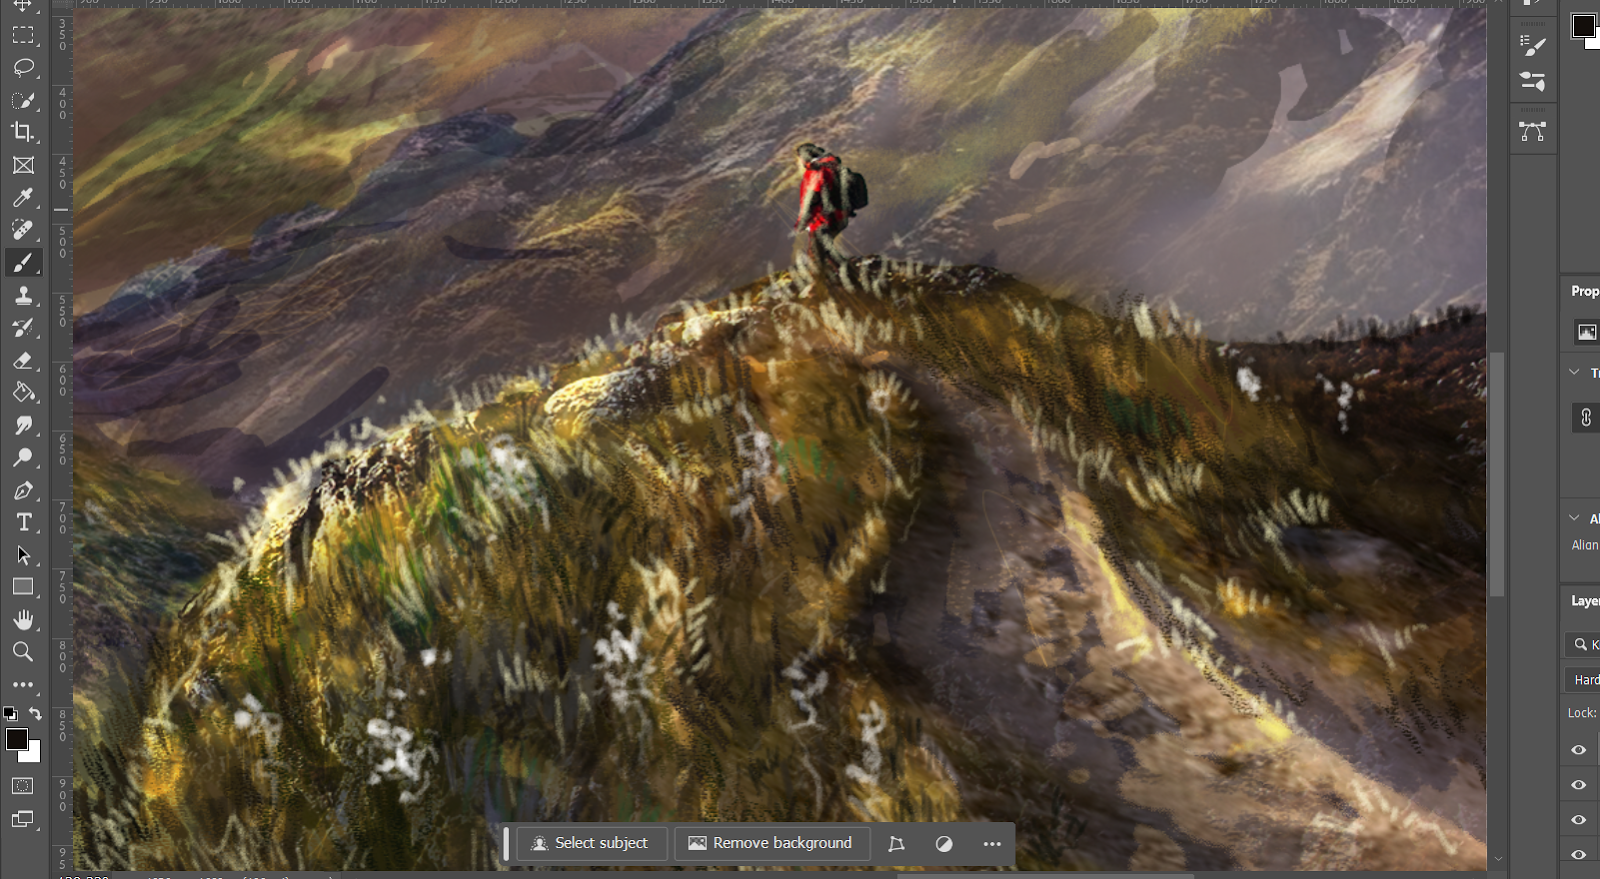 |
| fig 11.1.1 grass refinement. |
 |
| fig 11.1.2 villager community |
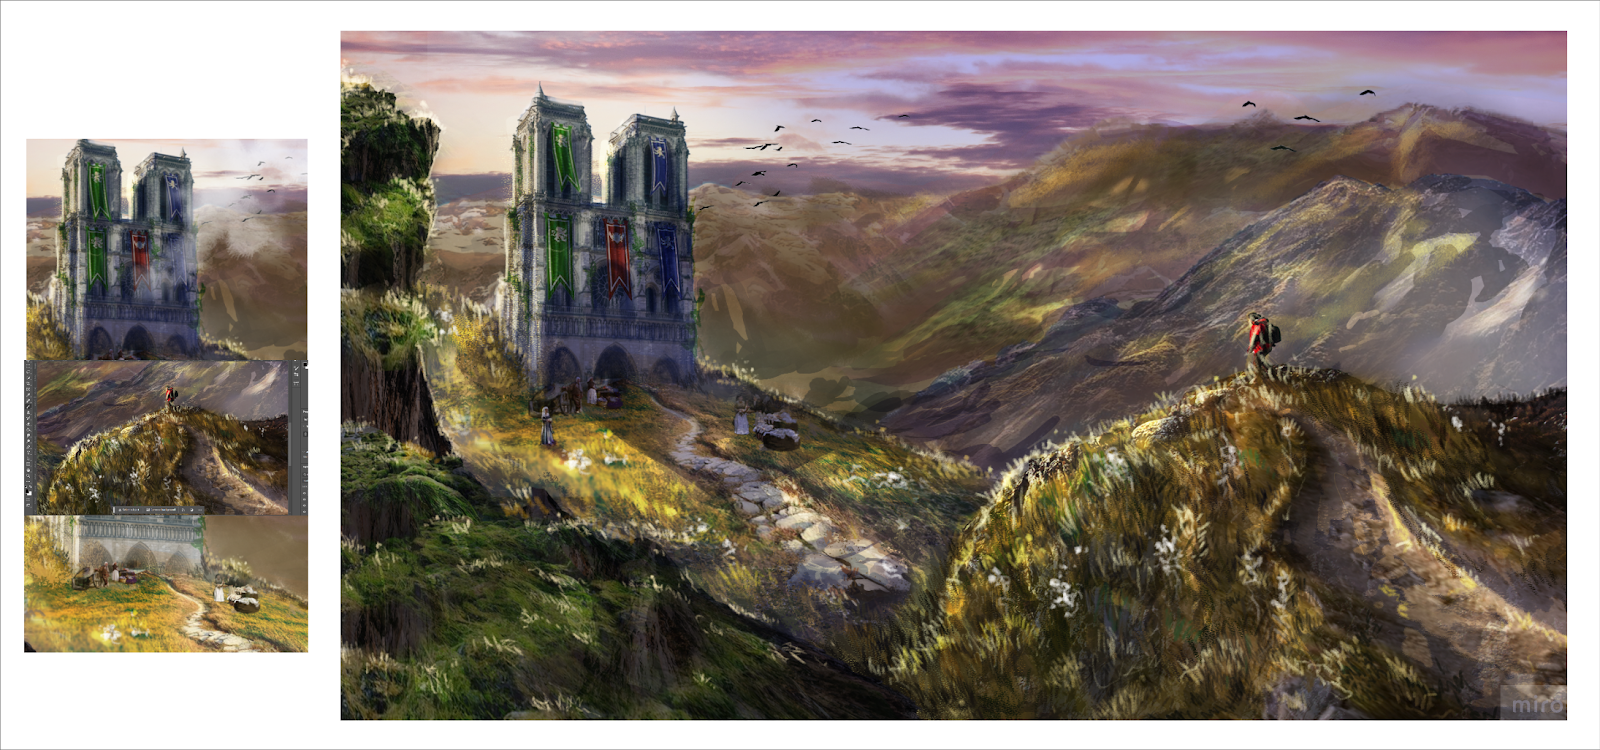 |
| fig 11.2 W12 invisible set extension progress |
Feedback
- think about compositing and storytelling
- make sure the added elements can mesh seamlessly
- look up "trees/tropical" assets on unity
- do major corrections, then do the cutting only start refining the details
building
- depth is missing (use shadows)
- banners should stand out more w more shadows
- offset the building more
- details
- 200dpi, sharpen & add HIGH reso texture
- expand the buildings to the side (tents, flags)
background
- add a river at the back
- open up the mountain, add more shadows
- add some backlight
- make the bg darker and paler, and cool blue hues so the foreground standouts more
- add highlights (shiny areas) at the edges
 |
| fig 11.3.1 W12 feedback |
WEEK 12 (17/11/2023)
To-do:
- hand in Project 2
- try out unreal
- look for fog videos for overlay
- Explore Blender 3D terrain
- refine ISE
This week, we had a tutorial on how to operate Unreal engine. It was very interesting to explore the unreal interface and its functions. There are many existing assets that can be used for our VFX.
Generally, when constructing an effective VFX, here is the rule of thumb:
 |
| fig 12.1.1 Unreal tutorial |
front- 3D
middle- slight 3D
background- flat
Feedback
 |
| fig 12.1.2 VFX compositing |
I worked on opening up the mountains and giving the piece more depth by adding more shadows. I started painting a whole lot more than I ever anticipated when going into this project. I also added some rock extensions for the sides of the building because I simply could not find any piece of architecture that would fit into the scene seamlessly.
 |
| fig 12.2 Matte painting progress |
- more photo bashing on painting streaks
- change b&w contrast (Ctrl J & ctrl+L) then cut it clearly
- give the front piece some rock cavities and sharpen it
- create a grass brush (or find one ffs) to make the grass less paint (look into dual colour &brush settings )
- do it in unreal 🙏
Final Outcome
Project 2: Invisible Set Extension
Final Project: Thematic Matte Painting (VFX)
WEEK 13 (24/11/2023)This week, I refined the Invisible Set Extension according to the feedback. Honestly, there are not much obvious changes, just subtle ones. Looking at it now, the entire piece actually looked quite dark. I'm going to come back to this once I'm done building in Unreal Engine.
 |
| fig 13.1 Invisible Set Extension W13 progress |
There's unfortunately not a lot of progress for the week as I was swamped with the final presentation for Art Direction. Hopefully I will be able to work on Unreal engine next week.
This week, we had our final lecture. We were reminded to focus on big shapes first when building our environment.
 |
| fig 14.1 W14 lecture |
And that would've totally been what I would do... If Unreal didn't die on me. I, for the love of god, was unable to import any of the texture maps or assets downloaded from Quixel, and Unreal freezes on me every 10 minutes, and I cannot move on. Eventually, I did manage to get it to work for a bit, and I tried out some of the functions before it freezes on me again. Overall it was not a great first experience, to say the least.
 |
| fig 14.2.1 Unreal Engine making my life miserable |
 |
| fig 14.2.2 Unreal Engine try out |
WEEK 15 (8/12/2023)
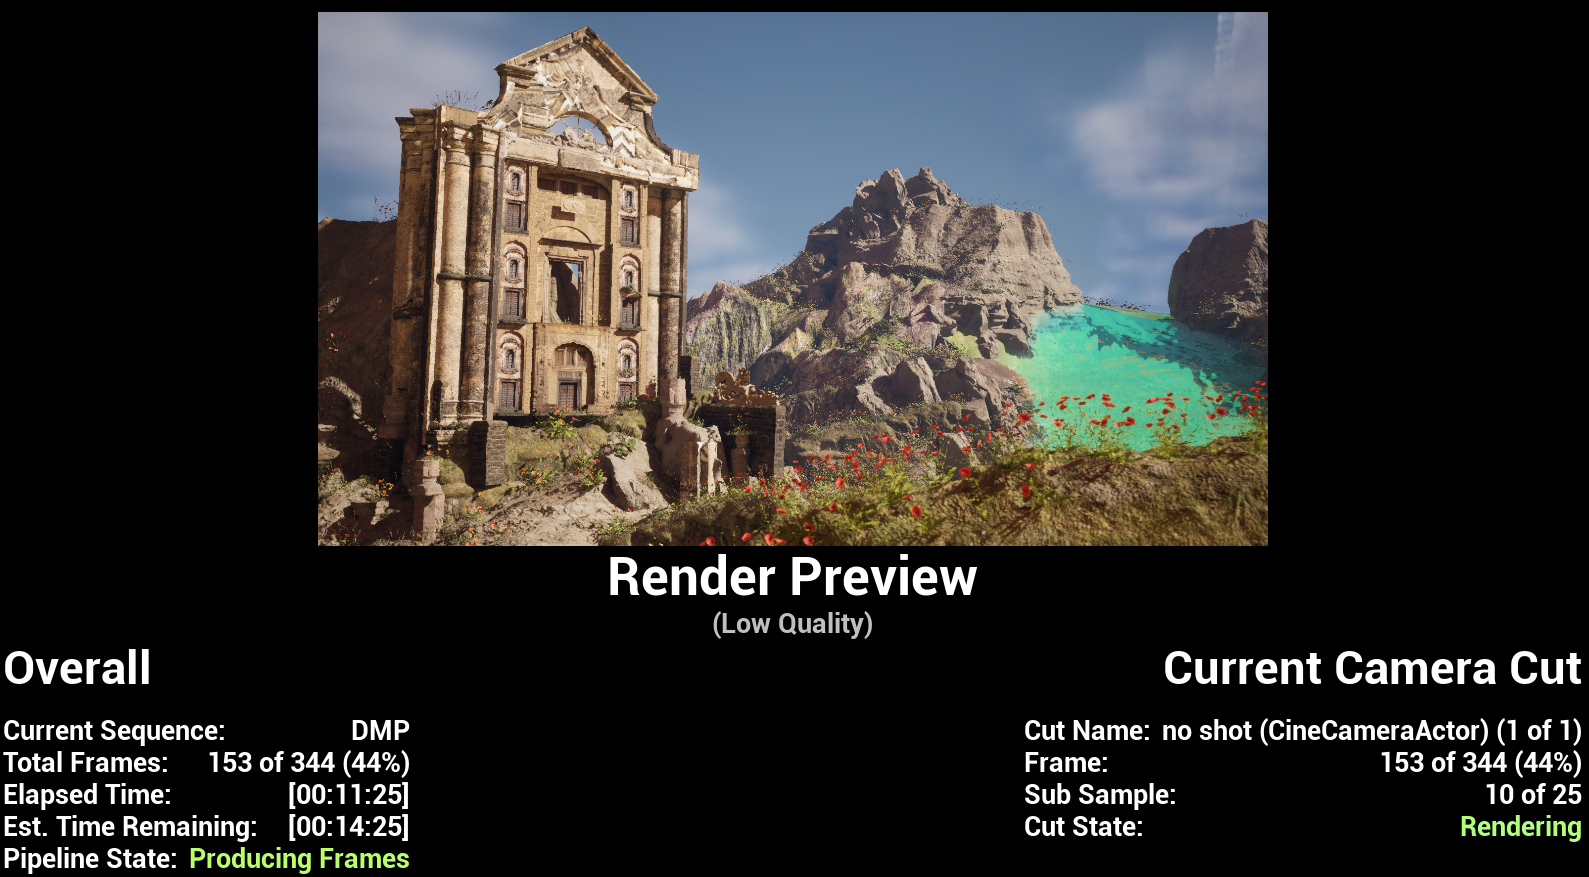
The second attempt was a lot better. Unreal engine finally decided to cooperate and I managed to import the assets downloaded from Quixel without tearing my hair out. The controls took a while to get used to, but now it feels like I'm playing a game in Unreal, and that felt pretty cool.
I had to activate additional plug-ins to insert a river into the scene and had a good laugh when my river flowed upwards instead of down from the hills. Foliage was still a mystery to me, and it took a while for me to realise I was selecting multiple foliage to be applied at the same time. I still couldn't figure out how to apply foliage on rocks, though.
 |
| fig 15.1.1 Unreal engine composition process |
 |
| fig 15.1.2 Unreal engine composition attempts |
Next, I looked up how to give my foliage a bit of wind. The first tutorial I followed pulled out a lot of nodes, and was confusing the heck out of me, but the second one was a lot simpler and I managed to figure it out quite quickly.
 |
| fig 15.2.1 Foliage wind settings |
Next, I moved on with the cinematics. I followed a few tutorials for this one, because I'm jumping between ones that I could understand best. It was a very simple process producing the cinematics, with the important controls working like Adobe AE.
The real problem however, was exporting the video.
My first attempt at exporting following the 1st tutorial gave me around 40 exr(?) files, that opens in photoshop. I was so shocked because I would be expecting more of a video, not each and every frame. So I moved on to a second tutorial, that directed me to download a software called the ffmpeg. It was a long process of getting Unreal to recognise the software and setting the output settings to mp4, but it worked, and I could almost taste my sem break on the tip of my tongue, but not yet.
 |
| fig 15.3.1 ffmpeg |
 |
| fig 15.3.2 Unreal engine cinematics process |
fig 15.3.3 Unreal Engine cinematics attempt 1
 |
| fig 15.3.4 rendering round 2 |
While waiting for that to complete, I looked up and downloaded sound effects I could use for the final video. I used Capcut to edit the video because I've heard good things about it, and by the time I thought I should've just stuck with Premiere Pro, I was already in too deep. At least I got to try out a different video editing tool, but I think this was more suited for vertical short form content like tiktok.
 |
| fig 15.3.5 Video editing in Capcut |
Honestly, not my best work, but I am not going through another rendering session where my laptop threatens to commit arson, so I tried my best to make the best with what I have. It is a very interesting process though, and I am intrigued to make more of these cinematics in the coming break.
fig 15.3.3 Unreal Engine cinematics attempt 2
Final Outcome
Final Project: Thematic Matte Painting (VFX)
DMP Final Project.pptx by Jiahui Leong
Cinematics
Reflection
I have a serious question... If we use Unreal engine to build everything... Is it even Digital MATTE PAINTING still? I was so confused by the end of the semester when Unreal Engine was suddenly added into the equation I feel like everything I'm doing defeats the purpose of what I was doing before.
But... I can look back at me from week 1 and proudly say that this was my favourite module this sem. Even though I started out completely clueless about matte painting, I truly felt like was constantly learning and enjoying the process, compared to other modules where I kept milking to produce more and more and more. I felt like I was learning and growing with this project, and that alone means a lot to me.
I was very intimidated by Unreal Engine in the beginning and was contemplating not using it at all, but I was so glad I did, because it was so cool. I def want to learn more about the software during my break and who knows, maybe use it for my FYP next year. This is my final assignment submission for the semester, and it's bittersweet to tie it up, but I'm glad I saved the best for last. With that, I'm wrapping up my second year of uni🐣.
Comments
Post a Comment