 Week 9 - Week 12
27/10/2023 - 17/11/2023
Leong Jiahui / 0353469
Bachelor of Design (Honours) in Creative Media
DST 60904/ DIGITAL MATTE PAINTING
Instructions
Project 1: Invisible Set Extension (Pre-Production)
WEEK 9 (27/10/2023) & WEEK 10 (3/11/2023)This week, I worked on photobashing. I was very inspired after watching a photo bashing painting progress, so I attempted it, ditching my Notre Dame completely and tried out this dystopian-looking city. It was, of course, a lot harder than it looked. 
fig 9.1.1 cyberpunk vibes? (no)
the messy buildings were an entire vibe, but the perspectives were horrible, and honestly I'm not too sure how to go about it. I spent too much time trying to make this work but it just did not and it got me into a huge art slump for a while. So unfortunately, I had to kiss the Hong Kong street aesthetics goodbye for now, and go back to my notre dames.
Coming back to Notre dames, I started refining and correcting my previous photobashing attempts. I painted over to create some shadows and highlights. It was actually quite a fun and therapeutic process.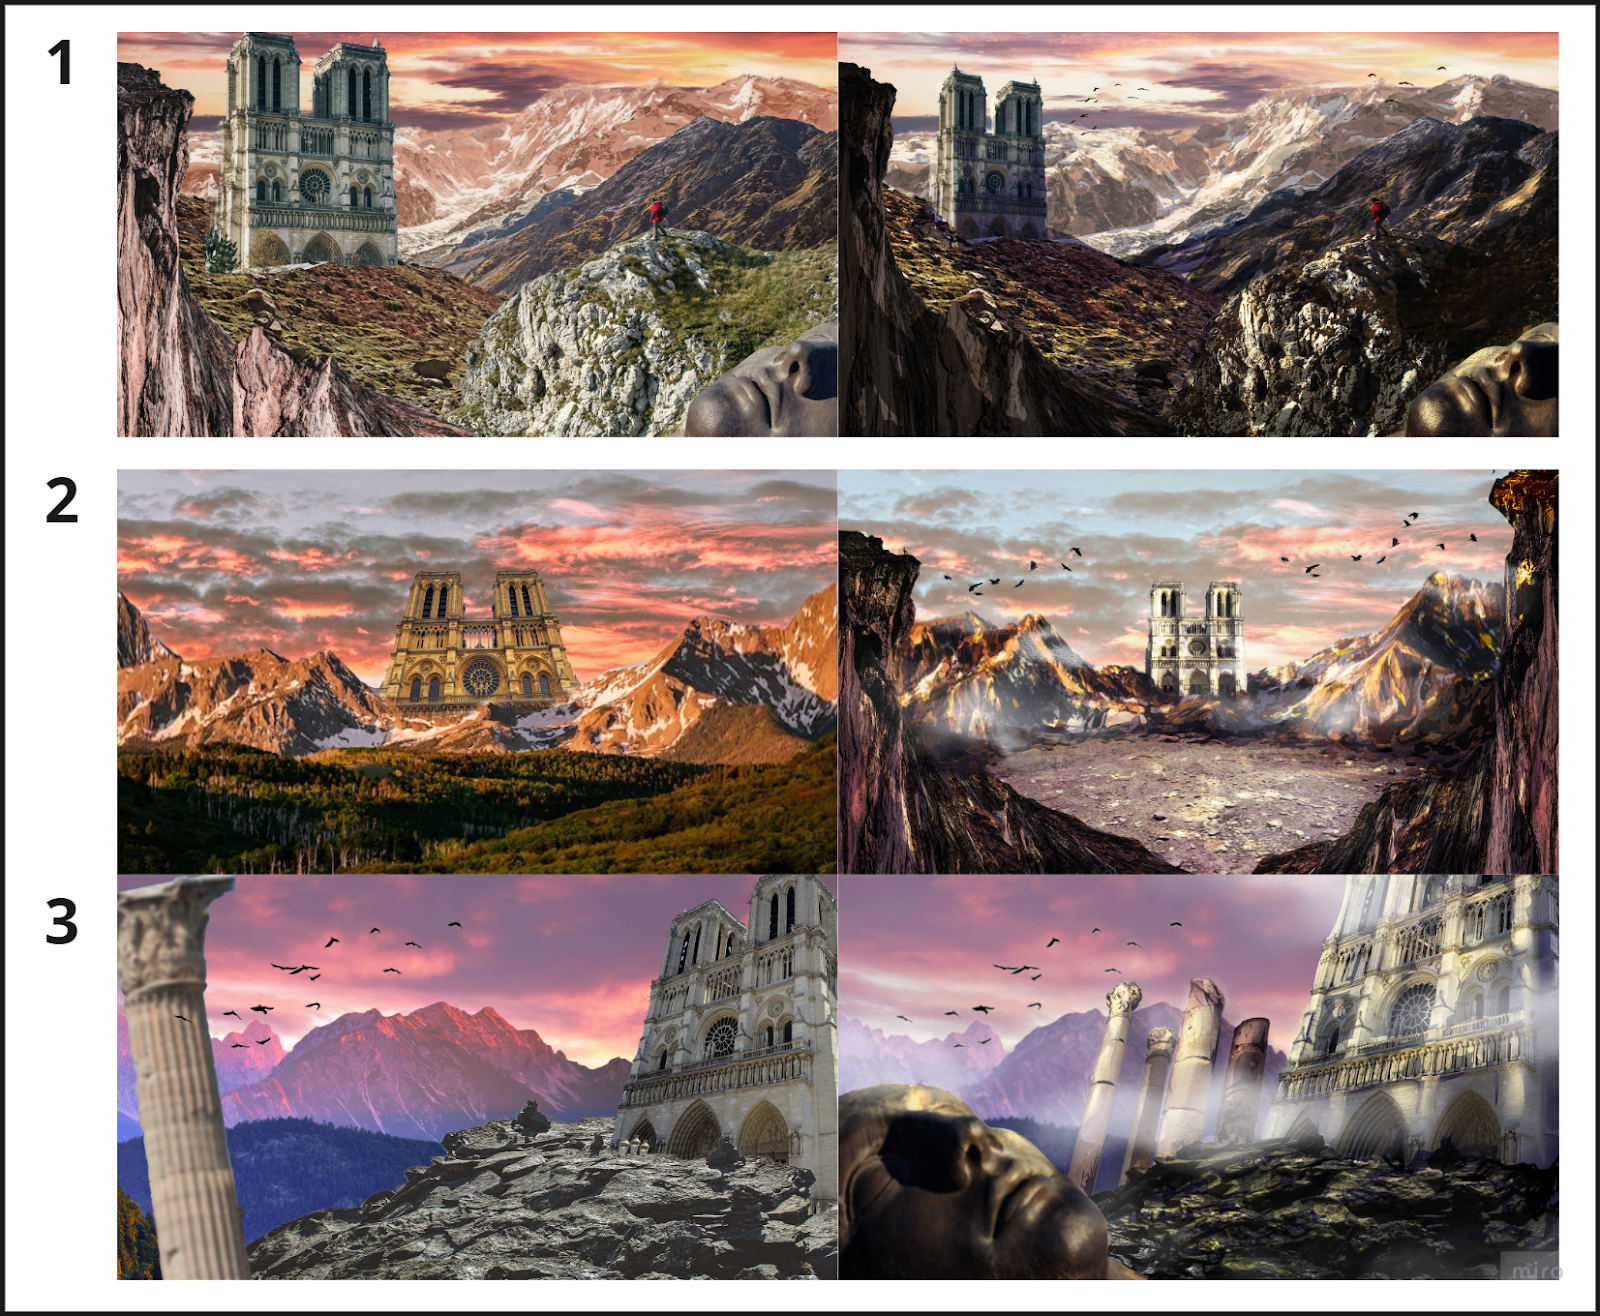
fig 10.1 photobashing
Feedback- colour harmony & ambience is lacking, needs to fit the mood w good colour palette planning
- utilize fog to add ambience & hide. look up smoke bushes or photobash w smaoke. (use screen layer mode)
- be very aware of scales
- construct a path to the building (mountain path)
- lacking a clear distinction between foreground and background
- find a good and solid base plate
- 1 is too busy but empty. Don't work w too much noise
- needs to have a foundation for the building instead of just stucking it in.
- suggest to add some grassy areas to give more variation
- blend-x
- find elements that suit the building like Paris architecture. statue head is random and does not fit in
- add something to the building. For example grassy elements
- look at castle mountains and refer to how they embed it in the rocks
- think about the depth when compositing
- PLAN
- turn existing pieces into black & white and reblock out the composition
WEEK 10 (3/11/2023)This week, the lecture was focused on how to produce a scenic view. We were taught to use blender to determine the scales of objects in a scene. There must be a sense of clarity between in the foreground, middle ground and background in terms of colour and proportions to make the overall scene more impactful. We were also given a quick tutorial on adding fog and ambience to the scene.

fig 10.1.scale & perspective
I started working on my own matte painting once more. I added some greens to the middle ground to provide some distinction to the background. I also added some fog to give it a mysterious atmosphere.

fig 10.2.1invisible set extension 1 progress
After staring at the first composition for too long, I moved on to the 2nd composition. I got rid of the foreground rocks because it didn't make much sense for them to be there. I then added grassy grounds to the foreground and gave the composition a pathway. I find that this composition gives a majestic vibe to the beginning of a great adventure.

fig 10.2.2 Invisible set extension 2
Feedback- add some cool colour to balance out the orange
- mountains are too busy and have too many details, tone it down
- further away make it more smooth
- look out for a degree of detail. Far-away objects should not have too much detail.
- 1. The direction of the foreground grass is a bit off
- look into creating more depth
- open up the mountains at the back to give more depth
- lookup Notre Dame
- 2. too much mountains.
- Think more about the story, experience and camera movement
- to make the building more dramatic. Think about the weather and the ambience. What is the building all about? Worship? Village? Can add some life and villagers around the building.
- add camera lens glow

fig 10.3.1 cutting the composition
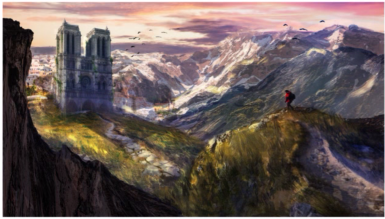
fig 10.3.2 colour adjustments

fig 10.3.3 W11 feedback
|
| fig 9.1.1 cyberpunk vibes? (no) |
|
| fig 10.1 photobashing |
Feedback
- colour harmony & ambience is lacking, needs to fit the mood w good colour palette planning
- utilize fog to add ambience & hide. look up smoke bushes or photobash w smaoke. (use screen layer mode)
- be very aware of scales
- construct a path to the building (mountain path)
- lacking a clear distinction between foreground and background
- find a good and solid base plate
- 1 is too busy but empty. Don't work w too much noise
- needs to have a foundation for the building instead of just stucking it in.
- suggest to add some grassy areas to give more variation
- blend-x
- find elements that suit the building like Paris architecture. statue head is random and does not fit in
- add something to the building. For example grassy elements
- look at castle mountains and refer to how they embed it in the rocks
- think about the depth when compositing
- PLAN
- turn existing pieces into black & white and reblock out the composition
WEEK 10 (3/11/2023)
This week, the lecture was focused on how to produce a scenic view. We were taught to use blender to determine the scales of objects in a scene. There must be a sense of clarity between in the foreground, middle ground and background in terms of colour and proportions to make the overall scene more impactful. We were also given a quick tutorial on adding fog and ambience to the scene.
|
| fig 10.1.scale & perspective |
I started working on my own matte painting once more. I added some greens to the middle ground to provide some distinction to the background. I also added some fog to give it a mysterious atmosphere.
|
| fig 10.2.1invisible set extension 1 progress |
After staring at the first composition for too long, I moved on to the 2nd composition. I got rid of the foreground rocks because it didn't make much sense for them to be there. I then added grassy grounds to the foreground and gave the composition a pathway. I find that this composition gives a majestic vibe to the beginning of a great adventure.
|
| fig 10.2.2 Invisible set extension 2 |
Feedback
- add some cool colour to balance out the orange
- mountains are too busy and have too many details, tone it down
- further away make it more smooth
- look out for a degree of detail. Far-away objects should not have too much detail.
- 1. The direction of the foreground grass is a bit off
- look into creating more depth
- open up the mountains at the back to give more depth
- lookup Notre Dame
- 2. too much mountains.
- Think more about the story, experience and camera movement
- to make the building more dramatic. Think about the weather and the ambience. What is the building all about? Worship? Village? Can add some life and villagers around the building.
- add camera lens glow
|
| fig 10.3.1 cutting the composition |
|
| fig 10.3.2 colour adjustments |
|
| fig 10.3.3 W11 feedback |
Final Outcome
Project 1: Invisible Set Extension (Pre-Production)
Project 2: Invisible Set Extension
WEEK 11 (10/11/2023)
To-do:- hand in Project 1
- further polish and refine Invisible set extensions
- work with blender
- look for 3d assets
This week, I started painting a lot. Besides the hue adjustments, I refined the grassy areas. I also added in more humans around the building to give it some life, and a community. 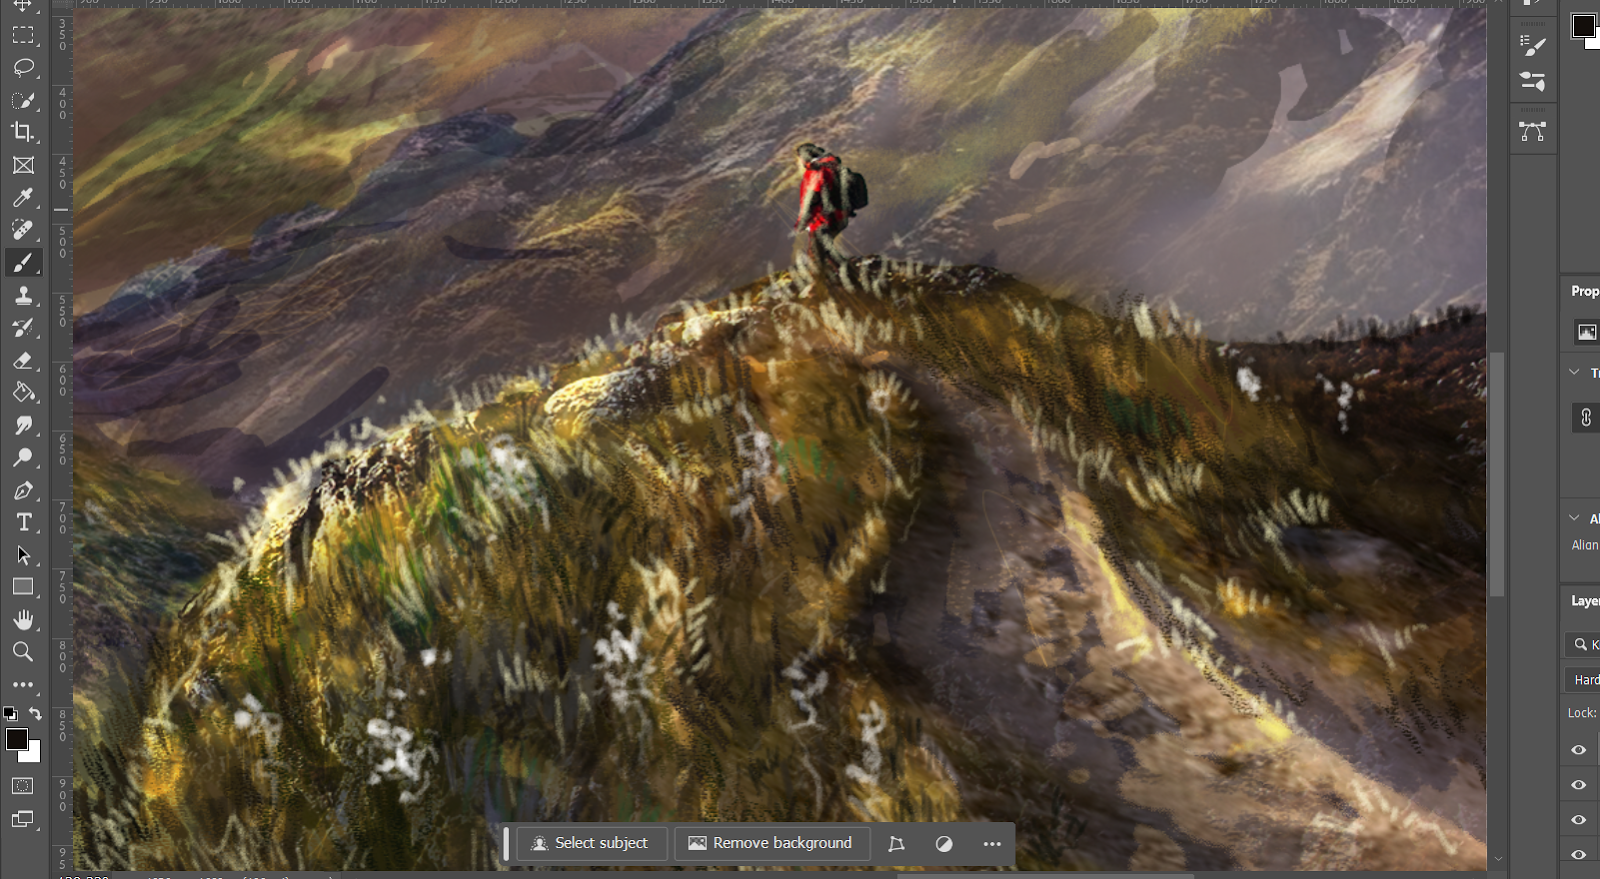
fig 11.1.1 grass refinement.

fig 11.1.2 villager community
I forgot to add more sunlight and lens flare but here is what I have for this week: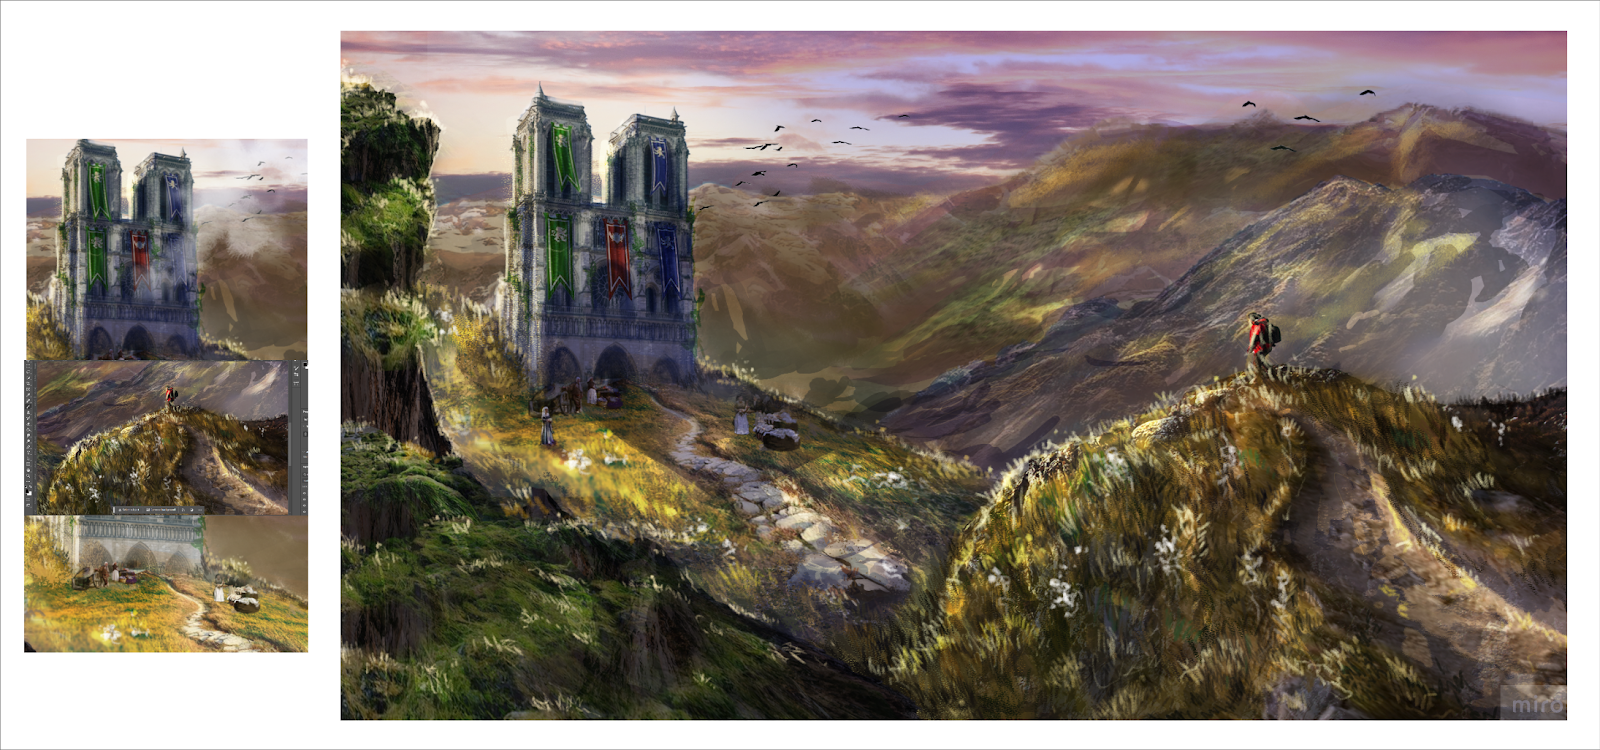
fig 11.2 W12 invisible set extension progress
Feedback- think about compositing and storytelling
- make sure the added elements can mesh seamlessly
- look up "trees/tropical" assets on unity
- do major corrections, then do the cutting only start refining the details
building - depth is missing (use shadows)
- banners should stand out more w more shadows
- offset the building more
- details
- 200dpi, sharpen & add HIGH reso texture
- expand the buildings to the side (tents, flags)
background- add a river at the back
- open up the mountain, add more shadows
- add some backlight
- make the bg darker and paler, and cool blue hues so the foreground standouts more
- add highlights (shiny areas) at the edges

fig 11.3.1 W12 feedback
WEEK 12 (17/11/2023)To-do:- hand in Project 2
- try out unreal
- look for fog videos for overlay
- Explore Blender 3D terrain
- refine ISE
This week, we had a tutorial on how to operate Unreal engine. It was very interesting to explore the unreal interface and its functions. There are many existing assets that can be used for our VFX.

fig 12.1.1 Unreal tutorial
Generally, when constructing an effective VFX, here is the rule of thumb:front- 3Dmiddle- slight 3Dbackground- flat
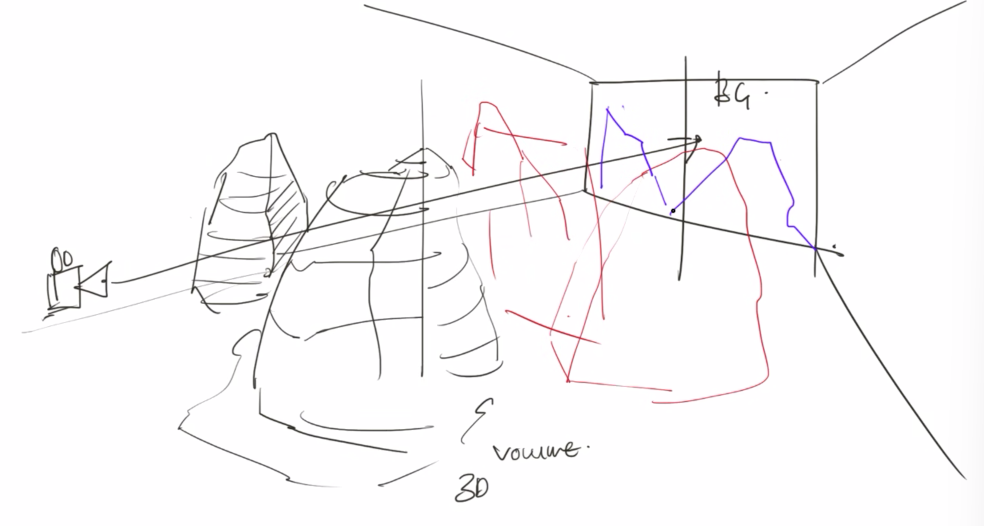
fig 12.1.2 VFX compositing
I worked on opening up the mountains and giving the piece more depth by adding more shadows. I started painting a whole lot more than I ever anticipated when going into this project. I also added some rock extensions for the sides of the building because I simply could not find any piece of architecture that would fit into the scene seamlessly.

fig 12.2 Matte painting progress
Feedback- more photo bashing on painting streaks
- change b&w contrast (Ctrl J & ctrl+L) then cut it clearly
- give the front piece some rock cavities and sharpen it
- create a grass brush (or find one ffs) to make the grass less paint (look into dual colour &brush settings )
- do it in unreal 🙏
To-do:
- hand in Project 1
- further polish and refine Invisible set extensions
- work with blender
- look for 3d assets
This week, I started painting a lot. Besides the hue adjustments, I refined the grassy areas. I also added in more humans around the building to give it some life, and a community.
|
| fig 11.1.1 grass refinement. |
|
| fig 11.1.2 villager community |
|
| fig 11.2 W12 invisible set extension progress |
Feedback
- think about compositing and storytelling
- make sure the added elements can mesh seamlessly
- look up "trees/tropical" assets on unity
- do major corrections, then do the cutting only start refining the details
building
- depth is missing (use shadows)
- banners should stand out more w more shadows
- offset the building more
- details
- 200dpi, sharpen & add HIGH reso texture
- expand the buildings to the side (tents, flags)
background
- add a river at the back
- open up the mountain, add more shadows
- add some backlight
- make the bg darker and paler, and cool blue hues so the foreground standouts more
- add highlights (shiny areas) at the edges
|
| fig 11.3.1 W12 feedback |
WEEK 12 (17/11/2023)
To-do:
- hand in Project 2
- try out unreal
- look for fog videos for overlay
- Explore Blender 3D terrain
- refine ISE
This week, we had a tutorial on how to operate Unreal engine. It was very interesting to explore the unreal interface and its functions. There are many existing assets that can be used for our VFX.
Generally, when constructing an effective VFX, here is the rule of thumb:
|
| fig 12.1.1 Unreal tutorial |
front- 3D
middle- slight 3D
background- flat
Feedback
|
| fig 12.1.2 VFX compositing |
I worked on opening up the mountains and giving the piece more depth by adding more shadows. I started painting a whole lot more than I ever anticipated when going into this project. I also added some rock extensions for the sides of the building because I simply could not find any piece of architecture that would fit into the scene seamlessly.
|
| fig 12.2 Matte painting progress |
- more photo bashing on painting streaks
- change b&w contrast (Ctrl J & ctrl+L) then cut it clearly
- give the front piece some rock cavities and sharpen it
- create a grass brush (or find one ffs) to make the grass less paint (look into dual colour &brush settings )
- do it in unreal 🙏
Final Outcome
Project 2: Invisible Set Extension
Reflection
I am shocked to find myself enjoying the process of this module. While I was not producing as much as my other modules, I can very clearly see the improvement throughout the weeks. My lecturer will disagree but I like to refer to this module as✨fancy photoshopping✨. The painting process in photoshop was quite therapeutic, and I'm quite happy with how different (and better) it looked every week. That alone felt like matte painting to me, and I am starting to understand matte painting in my own terms. I am reaching a point where I'm not sure how to push the piece further though, I hope I'll figure it out soon.
Comments
Post a Comment